I hope you enjoyed my last blog post about how many musical concepts we can draw from Starlight Star Bright. This blog going to be more interactive! We’ll explore Hi Lo Chikalo, a fun clapping game that is great for rhythm dictation and discovering something new about solfa!
If you missed Starlight Star Bright, take a look at my blog post to catch up.
Getting to know Hi Lo Chikalo
Listen to the melody below. I want you to listen and tap the beat on your fingers, just the same as if you’re tapping your legs but we’re going to position the 4 beats across our fingers:
A tip: If you’re doing this in front of a class so you need to do it so it looks left to right for them.
Try it again!
Now get a piece of paper and pencil!
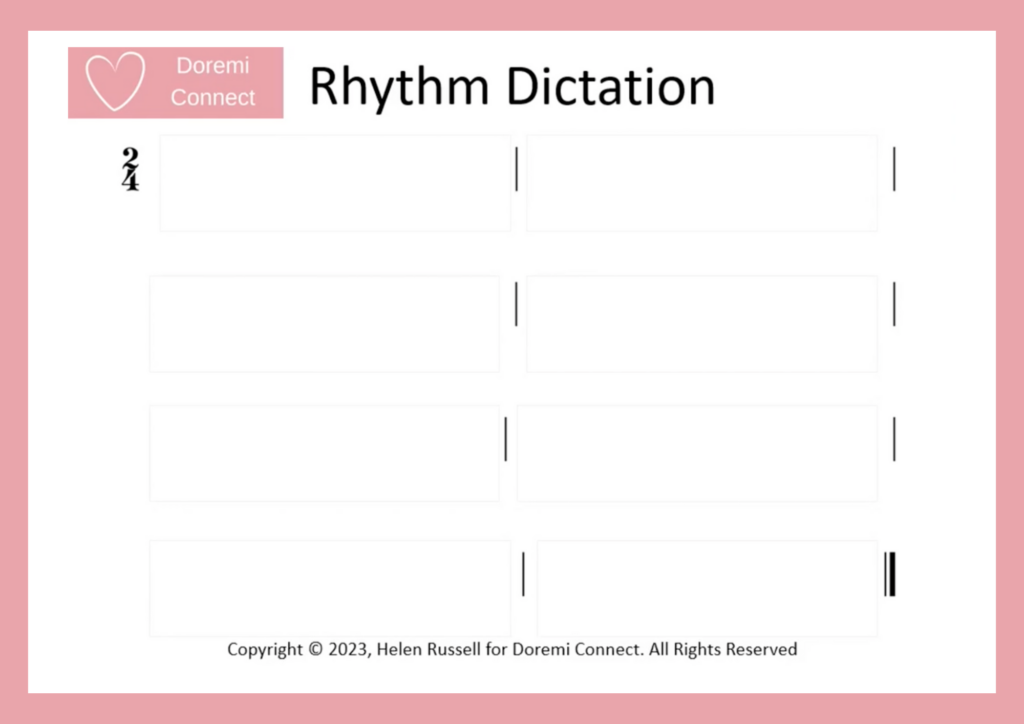
Draw 8 empty bars with two beats per bar like this:
Pencils down! Now listen again and follow the beats by tapping the position on the stave. We’ll end up with 4 beats across two bars. Don’t write anything yet! Listen out for patterns – are there any easy bars or repeated bars? This will make dictating it easier.
Are there any bars that are the same?
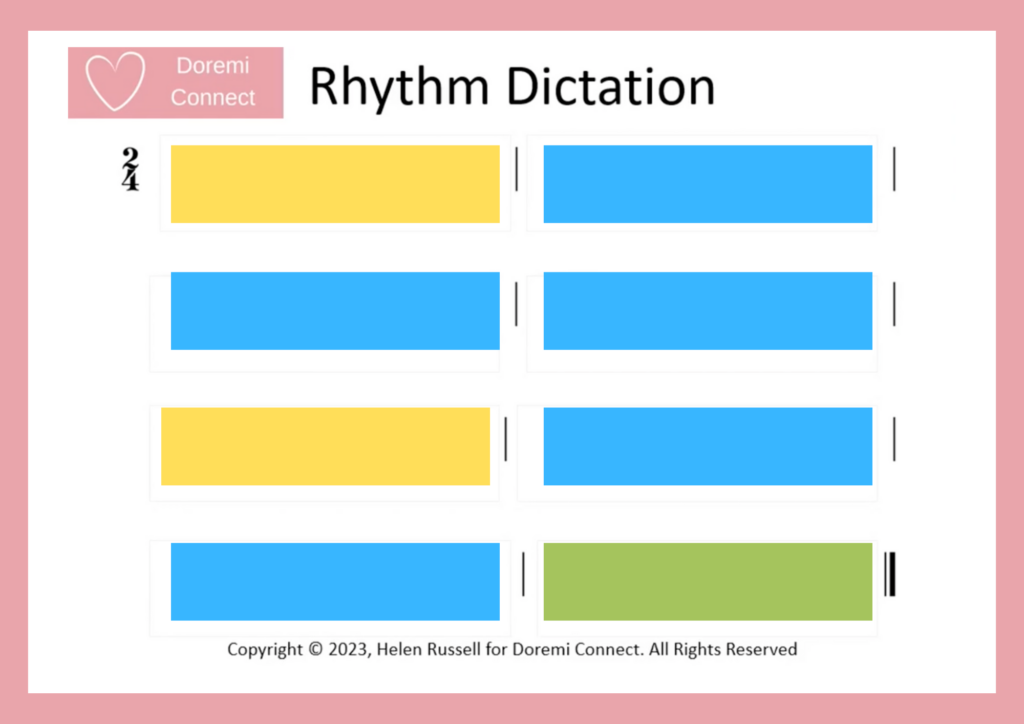
You should have this sort of pattern:
Keep following the page with your eyes, don’t write anything down! See if there’s anything that links the colours to the words….
All the blue bars are “Chikalo”, all the yellow bars are “Hi Lo” and the green bar is “Hi”
We’re not writing down the rhythm yet, just absorbing it all.
Let’s sing it again…
Now hide the coloured bars and words!
Sing and clap the rhythm for the whole song without it in front of you.
This time, can you tap the rhythm on your beat fingers. So if there’s one sound on the beat, you tap once and two sounds on the beat, tap twice.
NOW you can write it down!
So depending on the age and ability of your students and whether you’re in a group or one to one setting, you can pair them up and get them to make the rhythm with bricks or toys. You want to really make sure they’ve got it before you get them to write it down with pencil. If you pair them up and let them use bricks to arrange how many sounds in each bar, you give them chance to practice it. If they’re older they’ll probably pick it up more quickly so you can ask them to write it down sooner.
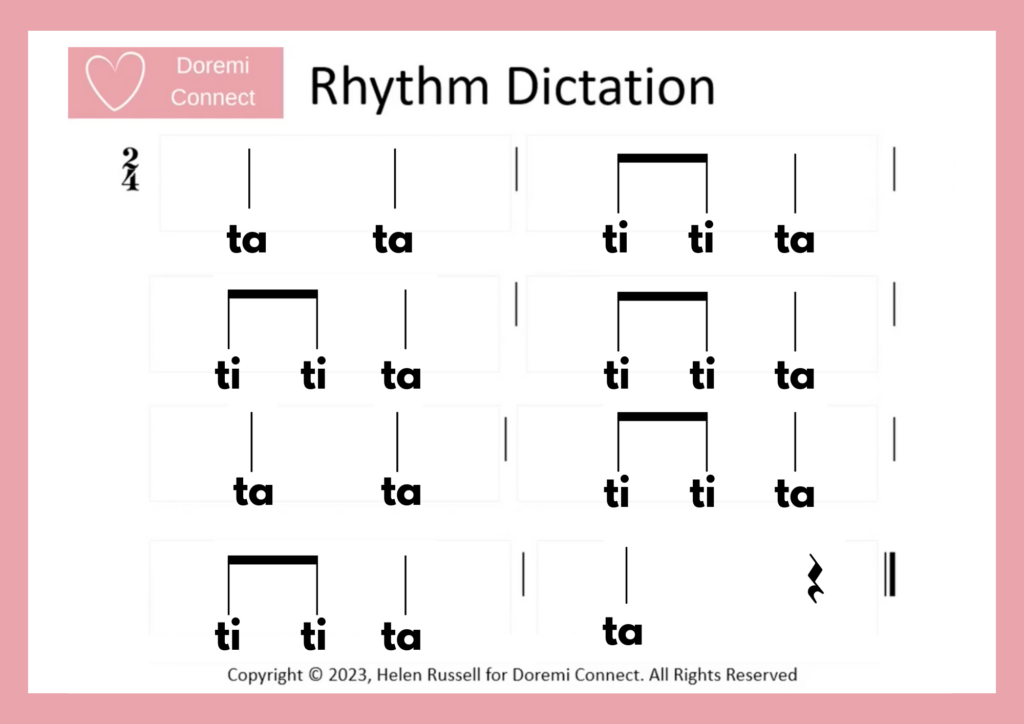
You should have something like this:
Let’s sing it with rhythm names:
The Game
This is a great clapping game!
To play the game with a partner, hold opposite hands back-to-back (let’s say right hand). When you sing “hi” clap your left hands above your held right hands. When you sing “lo” clap your left hands below your held right hands. Clap your left hand to your held right hands for “Chick-a”. There are plenty of video examples of this game on YouTube to see how it works.
I had to invent a new game during COVID so that I could teach it over Zoom. Here it is:
For “Hi”, clap high
For “lo” clap low
For “chicka” snap left fingers, snap right fingers
My students love trying to do this as fast as possible!
In a class setting you can play the game with a partner but also in a circle with the partners facing each other like this:
On the rest after “hi” at the end, everybody turns around to face a new partner.
You can also change the words to:
Lo Hi Chika-hi
Chika-hi, chika-hi
Lo Hi Chika-hi
Chika-hi lo
AND THEN… when they’re in a circle and they turn around in the rest, they switch from “lo/hi” and “hi/lo”
Those are ways to continue to the game to make it more challenging and more interesting. You can also do those activities before dictating the rhythm. If you follow the sequence of this post your students would be dictating something new.
Want more advice and ideas?
If you found this blog useful. Please comment below if you did or if there is anything you would like to say to me about it. If you’d like to find out more about preparing your students to learn about pitch and much more, including over a year’s worth of lesson plans for teaching all the important musical skills with Helen’s clear microsteps, why not try out Doremi Membership for 14 days for just £1?